HOW TO KEEP DEVICES LIVE
From Seizure to Evidence Storage to Data Extraction
Do you need to keep evidence shielded and charged?
To effectively access and recover data from cell phones and tablets, the latest forensic tools require devices to stay live. It can be difficult to keep devices shielded from radio frequency (RF) signals, charged at all times, and securely locked. The Mission Darkness Blocker Locker™ 7 system accomplishes all of these objectives in a single cabinet designed specifically for shielding, charging, and locking electronic devices.
The Problem
In order to follow protocol, when a police officer seizes a cell phone from a criminal, the device needs to stay shielded from RF signals and live until it can be transferred to a forensic box, faraday room, or data extraction tool to be analyzed. This in between stage is often for an unknown length of time, but it is immensely important that the correct steps are followed in order to prevent lockout mode and reduce the time needed to break a passcode, thus enabling the maximum amount of data extraction and unlocking capabilities with tools like GrayKey, Cellebrite, Magnet, XRY, BlackBag, Oxygen, etc.
Common Errors
- Mishandling of the device
- Breaking evidence chain of custody
- Device dying from not receiving power
- Device not always shielded from RF signals
- Not having all individuals involved (that come into contact with the device) using the same system during seizure to storage to data extraction
The Solution
Get all individuals that handle the device on the same evidence processing plan using the Mission Darkness Blocker Locker system. Ensure that device intake and storage is correct so that the passcode unlocking and data extraction process can be completed properly with the best results. The Blocker Locker includes simple instructions on the locker itself, so that all individuals involved follow the same procedure.
Watch our video demonstration to see how the Blocker Locker 7 system works!
Blocker Locker System Usage Steps
1.) INSERT DEVICE IN A CHARGE & SHIELD FARADAY BAG
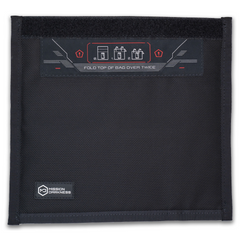
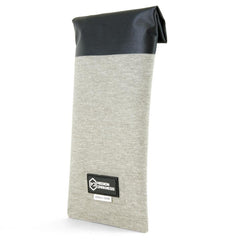
Once a cell phone, tablet, or similar device is received at the police station, the officer places it inside a Mission Darkness Charge & Shield Faraday Bag (included with the Blocker Locker kit), which is stored inside a vacant Blocker Locker compartment. The corresponding cable tip (provided in the back pocket) is used to connect the device to the bag's inner USB port. The bag is then sealed using the NeoLok™ magnetic closure.
2.) CONNECT THE BAG TO POWER
The officer connects the shielded USB A/M to A/M cable that is plugged into the locker compartment power outlet to the outer USB port on the Charge & Shield Faraday Bag. Device status can be confirmed by viewing the screen through the bag's transparent window.
Back Side + Cables
3.) LOCK THE BAG IN THE BLOCKER LOCKER COMPARTMENT
The officer locks the compartment, then puts the key in the lockbox, and leaves evidence notes relating to the locker contents. The device can remain in the compartment securely locked, charged, and shielded indefinitely.
4.) DISCONNECT THE BAG FROM POWER
At the point when passcode breaking or data extraction is to occur, the individual handling the evidence uses a key (either the master or corresponding one) to open the locker compartment. The user disconnects the USB cable connected to the outer USB hub on the bag, and removes the sealed bag from the compartment.
Front Side
5.) TRANSFER FOR DATA EXTRACTION
The device remains shielded in the Charge & Shield Faraday Bag while it is transferred to the lab or location where it will be analyzed. Further steps vary depending on the usage scenario.
Additional Usage Scenarios
How to Use with GrayKey
The Charge & Shield Faraday Bag can be transferred to an RF shielded room or faraday forensic box for use with unlocking tools like GrayKey.
- If using with a forensic box like the Mission Darkness BlockBox Lab, place the GrayKey unit inside the box and connect it to the inner RJ45 ethernet port.
- Insert the Charge & Shield Faraday Bag carrying the device into the box and close the lid.
- Place hands in the conductive gloves and open the Charge & Shield bag. The NeoLok magnetic closure is easy to open inside the box and reduces faraday glove abrasion (compared to Velcro closure bags).
- Once the device is removed from the bag, connect it to GrayKey and use the tool as directed.
If Using a Charge & Shield Faraday Bag without the Blocker Locker
- The Charge & Shield Faraday Bag can be purchased and used independently without the Blocker Locker. The USB filter enables the device to receive power while it is transferred throughout various locations such as a vehicle, desk, or evidence cabinet, until it can be analyzed in a different location. Use the shielded USB A/M to A/M cable attached to the outer side of USB filter to connect a portable battery or power outlet to charge the device inside. For data extraction, the user simply disconnects the power source and connects to an extraction tool.
How to Transfer a Device from a Standard Faraday Bag to a Charge & Shield Faraday Bag
- If a device arrives to the police station already in a standard faraday bag, it can be transferred to a Charge & Shield Faraday Bag using a forensic box with hands-on access. Simply place both bags inside, close the lid, and transfer the device using the conductive gloves. Faraday bags with a NeoLok magnetic closure are preferred when being handled by conductive gloves.
Benefits of Using the Complete Blocker Locker System
The Blocker Locker system was created to solve the ever-present device storage issues that many departments face. The system enables proper processing during each stage in custody, from device intake to interrogation.
Key Features our Customized Shielding System Presents -- Compared to Piecing Together your Own Materials:
- The pairing of the Charge & Shield Faraday Bag plus Blocker Locker allows for transporting, charging, data extraction, and keeping devices securely stored while shielded from RF signals.
- The locker has the capability to charge and fit 1-2 Charge & Shield Faraday Bags (up to tablet size), unlike mainstream locker compartments which are too small and only designed to hold a phone or tablet without the added mass of a faraday bag and cables.
- The included cables are shielded and specifically selected for use with the Charge & Shield Faraday Bag and locker.
- We tailored the locker charging setup to fit the digital forensics process. We included a power indicator light, dual USB power receptacles in each compartment, usage instructions, key lockbox, and all of the charging components needed. Incoming officers or detectives that don't know how to handle the device can view the instructional sticker printed on front of the locker to follow the correct processing steps (as pictured below).


