EMR Concern
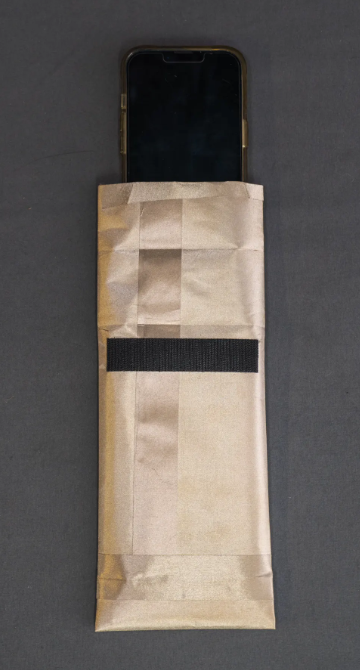
Finding a safe space from the digital atmosphere can be challenging in a world with various RF signals. Luckily, faraday materials are made to block these multiple signals, which could potentially otherwise threaten your electronics and jeopardize your data. The previous blog analyzed the health impact of RF exposure on sensitive tissues and its long-term effects on the male reproductive system. Since RF/EMR exposure is a modern concern, this article provides a step-by-step guide to building a lightweight faraday pouch for your phone at home. Whether you like DIY projects or are concerned with the health implications of EMR exposure, this phone pouch is excellent for people of all ages and a bargain DIY Faraday project under $30.
DIY Supplies Required
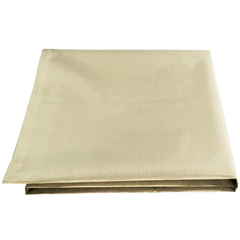
- TitanRF Faraday Fabric Kit - $24.78 (44"W x 36"L + 36" x 1" tape strip)
-
Velcro Strips - $3.28
Total price after tax = $28.07
Step 1 - Cut and Fold
First, Notice your faraday fabric kit includes a faraday tape as well, put this aside for now, as we need to first cut our fabric to size.
Cut your faraday fabric into a rectangle with dimensions 10" W x 23" L, then fold it half length-wise so the material is double-layered.
Step 2 - Crease
The double-layered fabric measuring 10" W x 11.5" L requires two 3" creases from each side and a 1.25" fold on the bottom end.
Once your folds are in, place the phone in the middle of the fabric to ensure the device will fit comfortably.
Step 3 - Tape
Fold over the two 3" sides and tape the middle seam with the faraday tape.
Once the sides are in place, it should look like a tube. Then fold the bottom 1.25" end up to ensure the phone does not slip out.
Cut the faraday tape into two strips and secure the layered faraday sheets and clean up the top edge.
Step 4 - Top Fold
The top fold has two sections; the upper portion is 1.5" long, and the lower section is 2" long.
Ensure the upper secion is slightly smaller so the fold is not obstructed by the fabric.
Step 5 - Apply Velcro
Apply the velcro adhesive strip about .25" from the lower 2" section crease to create the top seal.
Getting the velcro to line up may be tricky, so sticking the velcro ends together with the upper velcro strip's adhesive side facing up guarantees the velcro to line up.
Once you fold over the top 2 folds, press down on the fabric, and the velcro will stick to the faraday fabric.
Once your new sleek faraday phone sleeve is completed, we recommend testing your DIY faraday phone pouch to ensure no signal leakage.
To ensure your Faraday bag is functioning properly, follow these steps:
- Cellular Test: Place your phone inside the bag and attempt to call it. If the call doesn’t go through, the bag is blocking cellular signals.
- Bluetooth Test: Try connecting a Bluetooth device while your phone is in the bag. If it doesn’t connect, the bag is blocking Bluetooth frequencies.
- Wi-Fi Test: Send an iMessage or any Wi-Fi-based message while the device is inside the bag. If the message fails to deliver, the bag is blocking Wi-Fi signals.
Make sure the bag is fully sealed during testing to achieve the best results.
READ Related Post
Author Nick Ely / Category DIY / Published: Nov-05-2022
EMR Exposure
Health implications of reproductive tissue from EMR exposure


