The Complete Solution for Securely Transferring Mobile Devices from the Field to the Lab
THE PROBLEM
In order to follow protocol, when a police officer seizes a cell phone from a criminal/crime scene, the device needs to stay shielded from radio frequency signals and live until it can be transferred to a forensic box, faraday room, or data extraction tool to be analyzed. The device is often handled by numerous individuals during this process, and can sit untouched in an in-between stage sometimes for weeks or months until it can be analyzed. It is immensely important that the correct steps are followed at every stage in order to maintain chain of custody and prevent lockout mode, which is caused by a device losing battery power and shutting off. Keeping the device charged at all times reduces the time needed to break a passcode, thus enabling the maximum amount of data extraction and unlocking capabilities with tools like GrayKey, Cellebrite, Magnet, XRY, BlackBag, Oxygen, etc.
Anyone handling digital evidence in the field should protect devices from remote wiping and alteration to maintain chain of custody.
COMMON ERRORS
- Mishandling of the device
- Breaking evidence chain of custody
- Device dying/losing battery power and turning off, causing it to become "locked"
- Device not always shielded from RF signals (any slight break in RF shielding may allow the device to receive signal, thus allowing wipe commands, location tracking, etc. to occur)
- Not having all individuals that come into contact with the device informed and following the correct digital evidence handling procedure throughout each step from seizure to storage to data extraction
THE SOLUTION
Get all individuals that handle the device on the same evidence processing plan using specific tools for shielding digital evidence. Ensure that device intake and storage is correct so that the passcode unlocking and data extraction process can be completed properly with the best results. The infographic below demonstrates what products are preferred for each department and budget. By having agencies provide the right equipment and training to their officers and investigators, all individuals involved will be able to follow the same procedure. The streamlined process ensures that devices remain shielded and charged throughout the entire timeline... from seizure → evidence storage → data extraction.
COMPLETE SOLUTION INFOGRAPHIC
The FIELD to LAB infographic shows the recommended steps and products to use for transporting a device from the field to the lab. There are a few different options depending on your budget and scenario.
COMPLETE SOLUTION DEMO VIDEO
The FIELD to LAB video demonstrates the recommended digital evidence handling process in action.
CLOSER LOOK AT HOW TO TRANSFER EVIDENCE
FROM THE FIELD TO FRONT OFFICE
A faraday bag should be used immediately upon seizing/collecting a device (digital evidence)
-
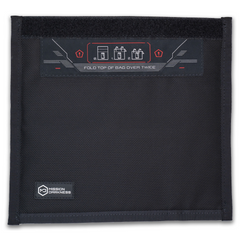
- The Mission Darkness Non-window Faraday Bag for Phones is the most cost effective solution for widely distributing faraday bags to all patrol officers for digital evidence collection in the field. Faraday bags with charging capabilities are preferred if the budget allows. Upgrade to larger faraday bag sizes to protect larger devices.
Evidence can be transferred from a standard faraday bag to a Charge & Shield Faraday Bag using a shielded Transfer Box
-
- Once received in the front office, the evidence can be transferred from the original faraday bag to a Mission Darkness Charge & Shield Faraday Bag using a Mission Darkness Transfer Box or faraday tent (if the evidence isn't initially placed inside this type of bag). The device connects to the bag's USB filter internally using the included tip kit. The Transfer Box ensures that the device remains shielded from RF signals at all times/while the evidence gets transferred between bags.
The front office separates the field and the lab so officers can bring digital evidence day or night. Devices are stored in charging and shielding lockers until the investigator is ready for analysis.
FROM THE FRONT OFFICE TO THE DIGITAL FORENSICS LAB
The Charge & Shield Faraday Bag connects to power inside of the Blocker Locker
-
- Now that the evidence is inside the Charge & Shield bag, it can be transferred to the Mission Darkness Blocker Locker 7 (which includes a power receptacle in each compartment), or charged using an alternative power source. The bag's shielded USB filter allows the device to receive power while waiting to be used in a faraday box or while breaking passcodes. The locker ensures that evidence stays secure and organized.
Interior view of a cell phone being analyzed inside of the BlockBox Lab using GrayKey for passcode breaking
-
- The evidence finally makes its way to the lab once the passcode has been broken and/or the digital forensics investigator is available to analyze it. Keeping evidence charging in a faraday bag prior to interrogation allows forensic boxes, like the Mission Darkness BlockBox Lab, to remain free for top priority cases.
- The evidence processing system laid out utilizing Mission Darkness products ensures that the device stays live and RF shielding is achieved throughout every step, maintaining chain of custody and reducing the time needed to break the passcode.
The digital forensics investigator's time is always limited. Separating "front office" responsibilities from the investigator, as well as the right shielding and charging equipment, provides more time for critical work.
Once the device is securely transferred to the lab (such as a forensic box like the BlockBox Lab or a faraday tent), the investigator can extract data and conduct analysis with tools like Cellebrite.


